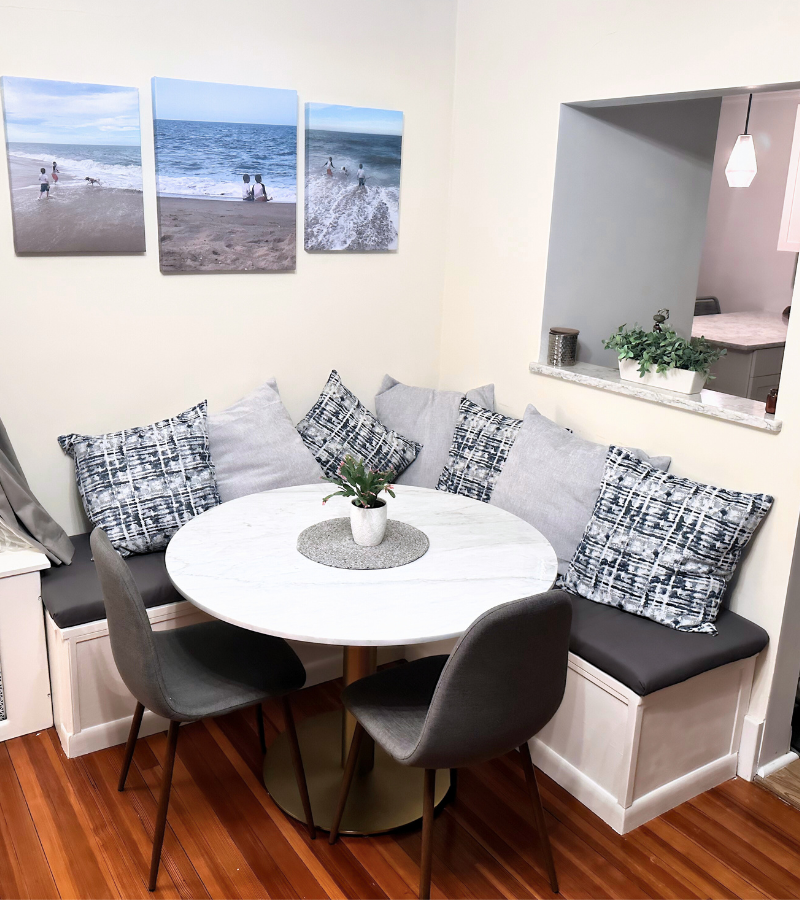
Build your own stylish and functional DIY corner bench with storage! This step-by-step guide makes it easy to create a beautiful piece that’s perfect for any space.
Materials
Here is the list of tools you’ll need for your Corner Dining Nook Bench:
Measuring tape
Pencil
Level
Hinges
Paintbrush or roller (optional for finishing
Shop the Products
Note: Some links in this post are affiliate links, meaning I may earn a small commission at no extra cost to you. Thanks for supporting my DIY projects!
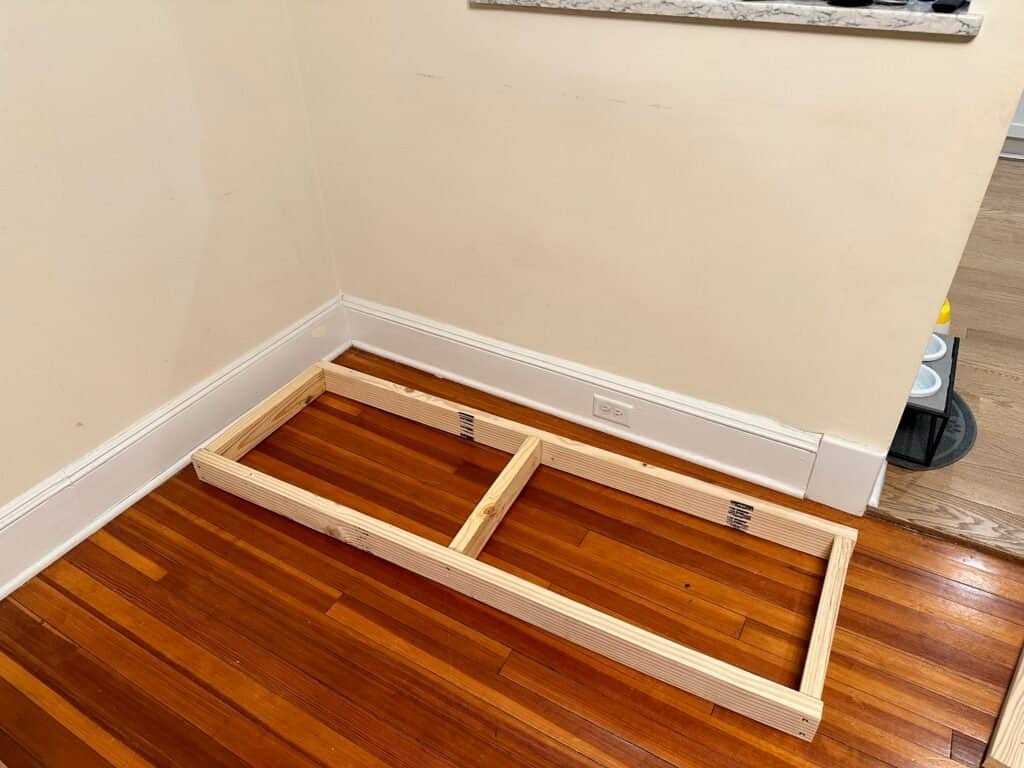
Step 1: Measure and Plan
Before diving into your DIY corner bench project, begin with careful measurements of the corner space where your bench will reside. Consider the overall dimensions of your bench, ensuring to account for both storage needs and comfortable seating height. Cut your lumber to the necessary lengths for the base frame and vertical supports.
Step 2: Build the Base Frame
Next, it’s time to assemble the base frame using sturdy 2×4 lumber. Secure the pieces together with wood screws, making certain the frame is level and robust. Test fit the frame in the corner to confirm it fits snugly before proceeding further.
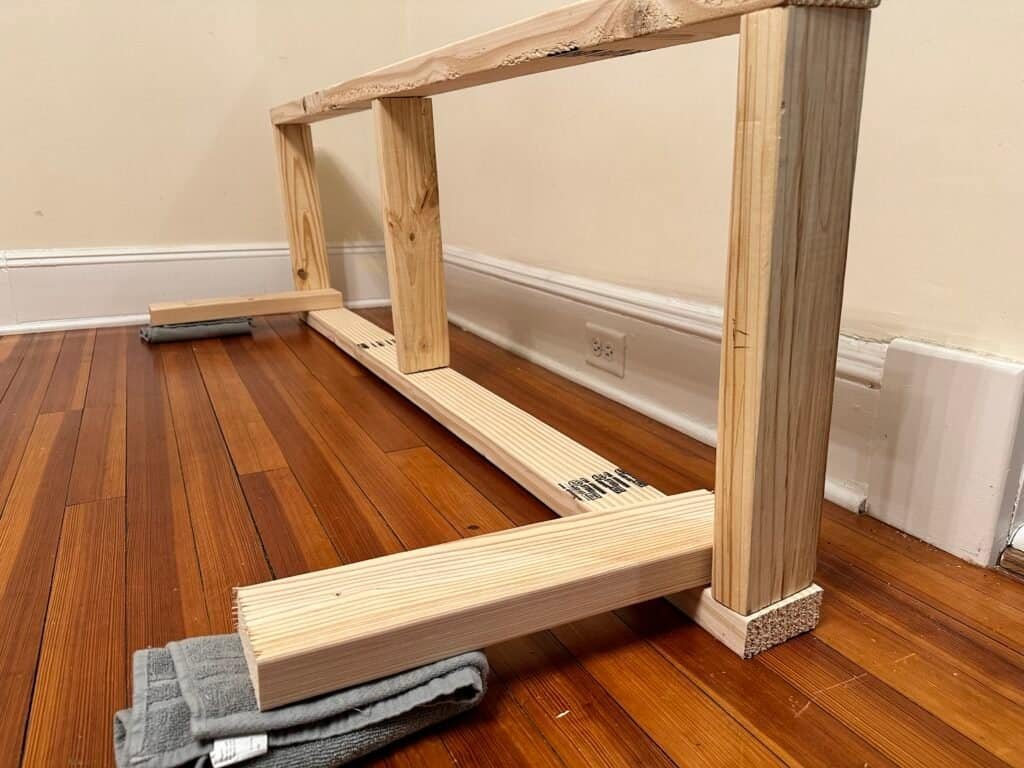

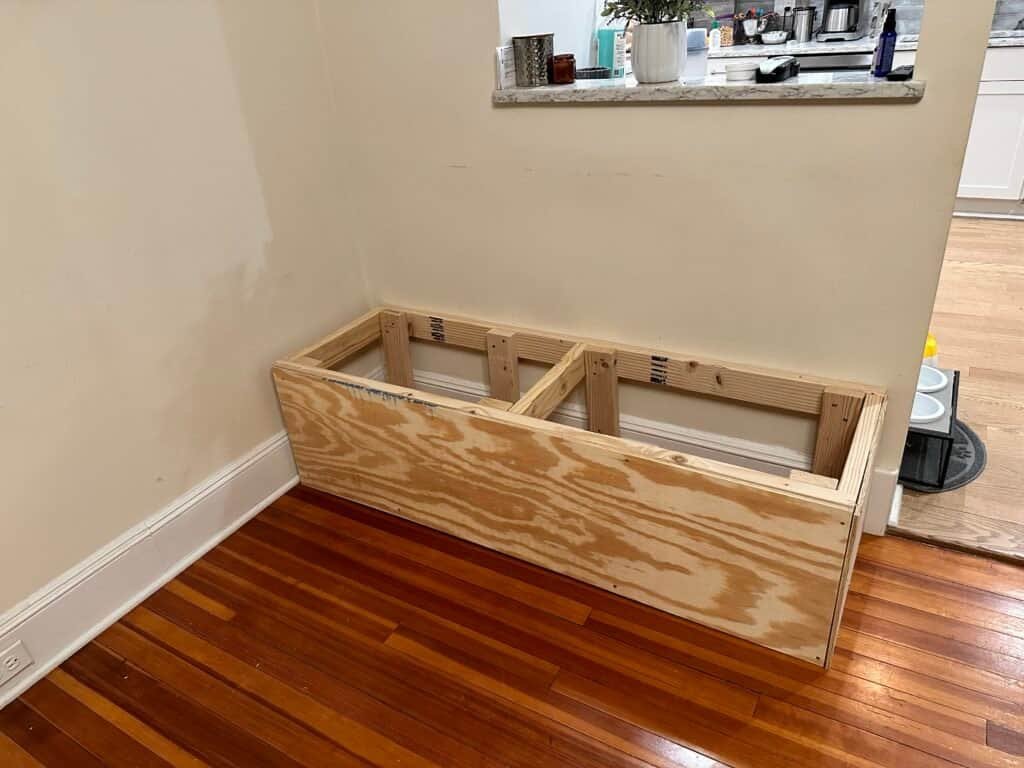
Step 3: Add Vertical Supports and Complete the Structure
Attach vertical supports to the base frame to establish the structure for your bench seating. It’s vital to space the supports evenly for enhanced stability. Take a moment to ensure all supports are level and plumb, as this will be essential for both strength and aesthetics.

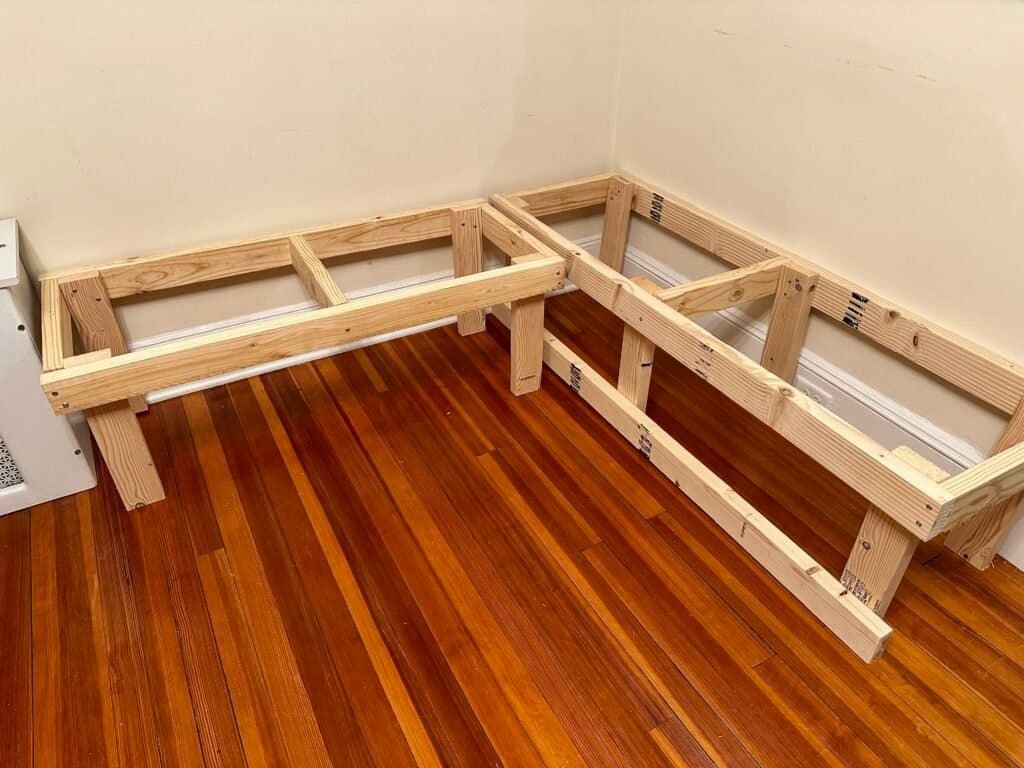

Step 4: Final Assembly and Enjoy!
Continue assembling the seat frame by attaching horizontal supports atop the vertical ones. Depending on your design, connect multiple bench sections securely to form a cohesive piece. Cut and affix plywood panels around the frame for a clean appearance. Lastly, install beautifully cushioned tops for that touch of comfort.


And there you have it! A delightful DIY corner dining nook bench with integrated storage. It adds charm and practicality to your dining area! Enjoy sharing your cozy creation with friends and family.